Motion Detector
Introduction
 OpenCV Python Documentation [↗]
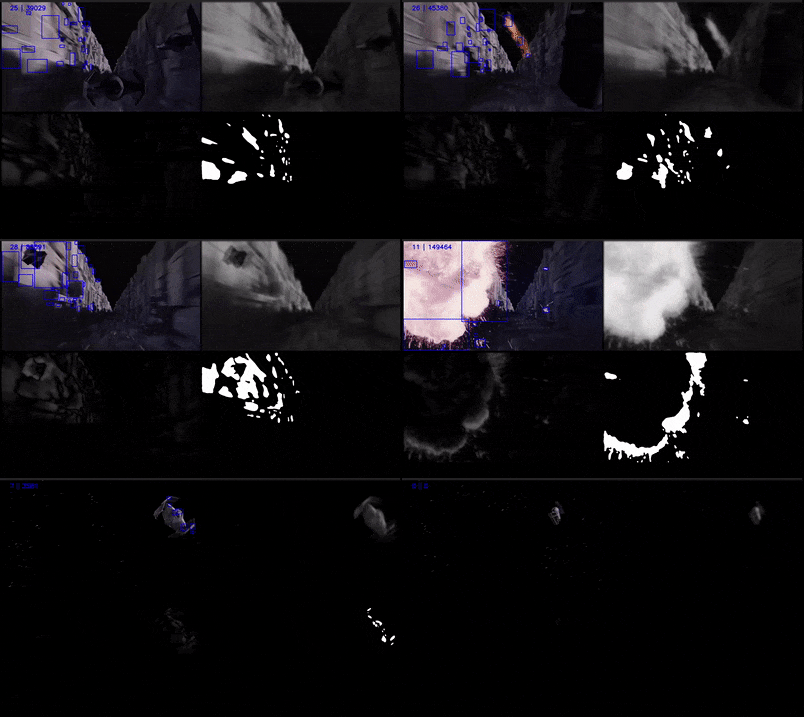
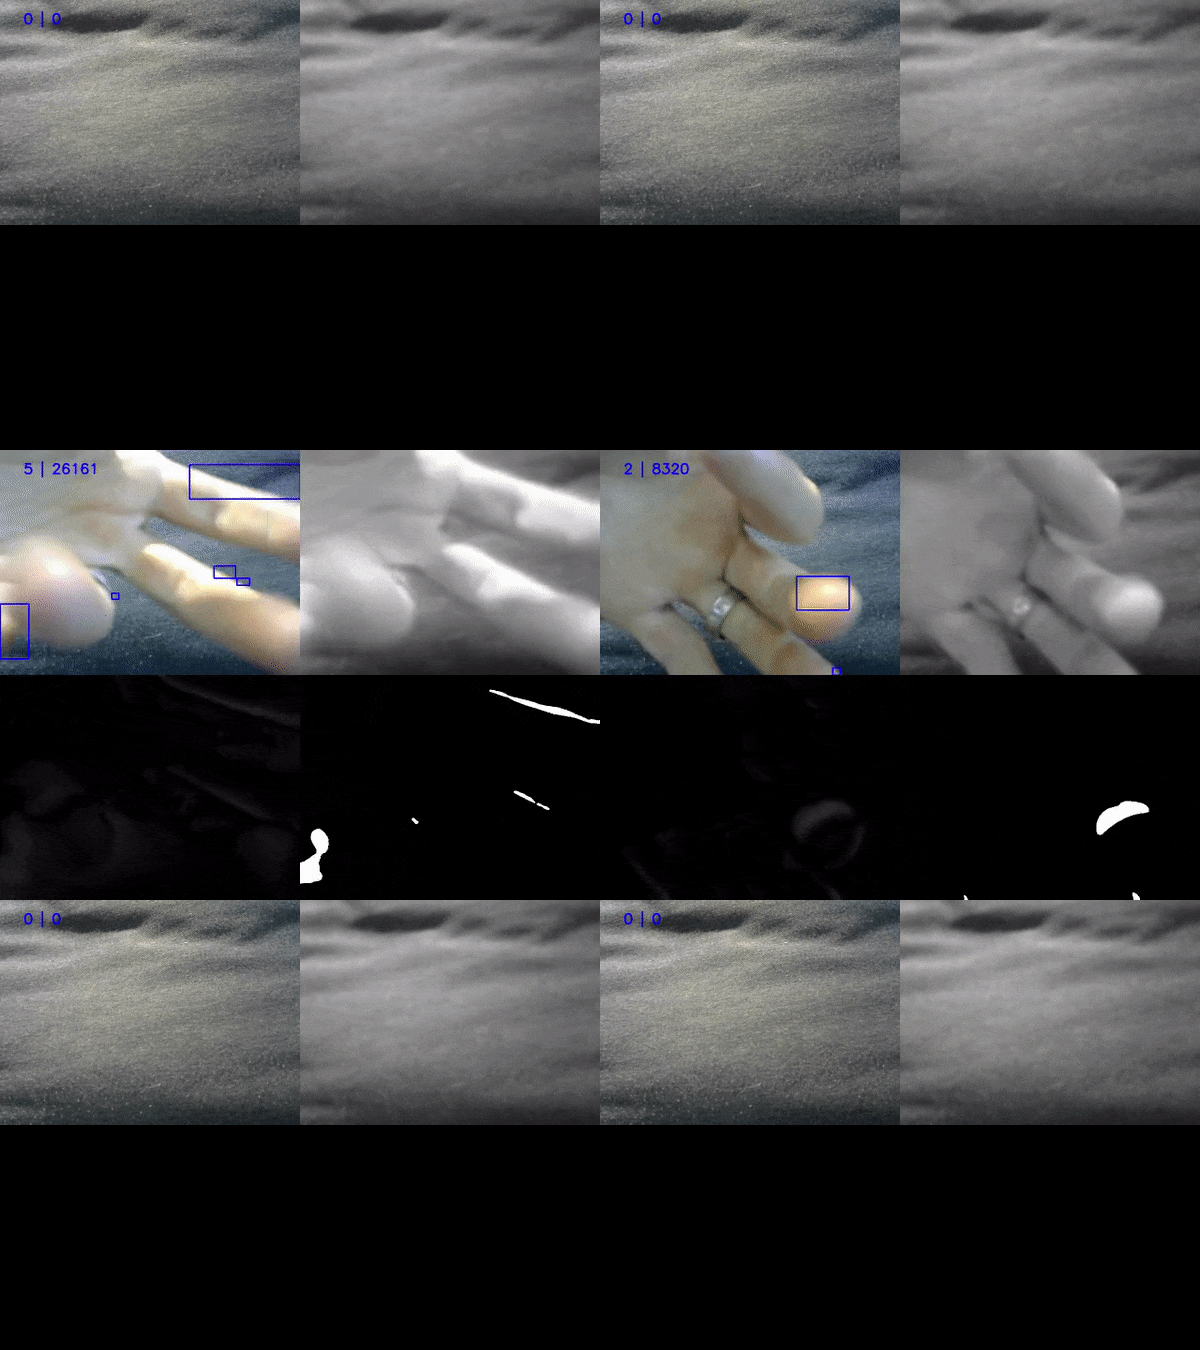
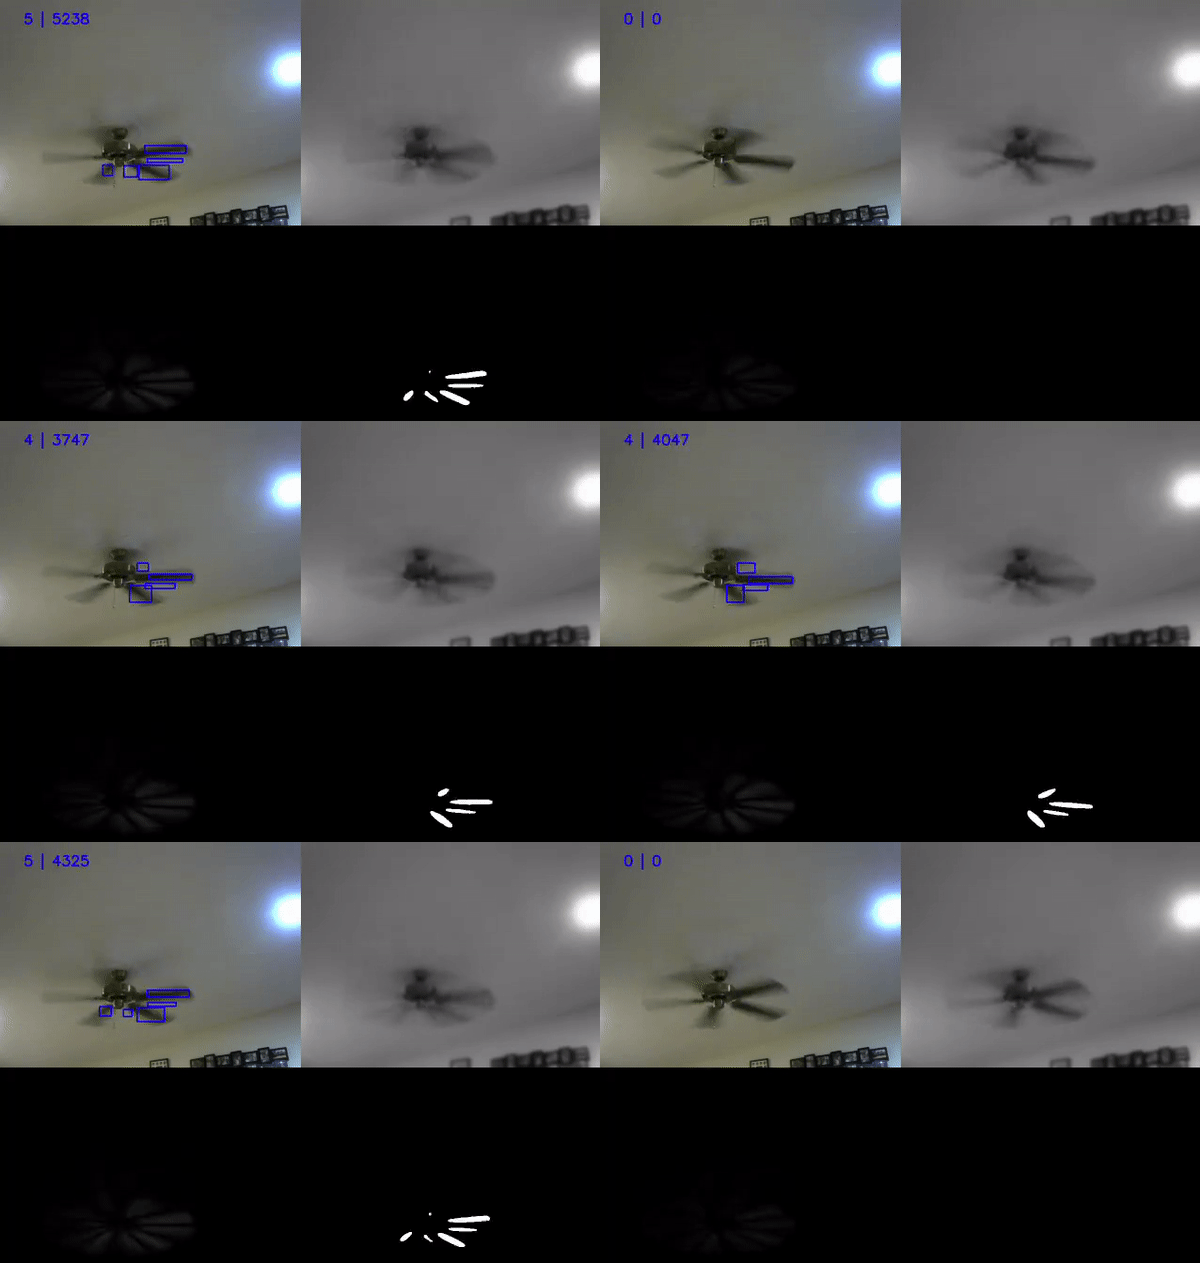
I feel like a good start is to just show the final product. Everything else comes from that:
 [↗]
[↗]
[↗]
[↗]
The gif is a bit choppy but I think you get the idea.
Input
The first step is to get a sequence of frames. OpenCV makes it easy enough to pull from a webcam, but you can also use existing footage if you don’t have one.
In the images above, this is the top-left corner.
Normalizing
Now that we have our frame we need to normalize it, otherwise tiny jitters in the camera will cause us to detect motion we don’t want. I’m sure there are better ways to handle this but all of the examples I saw online involved:
- Converting the image to grayscale
- Applying a gausian blur
You can see the effect by comparing the top left and top right images. You’ll notice it’s in black and white and slightly blurrier.
Reference Frame
The algorithm isn’t really detecting motion - it can’t look at a still picture and infer what is moving. Instead it’s looking for changes in color that can be interpreted as motion. To accomplish this I need two images: the current image I’m looking at and a reference image.
The simplest technique is to take the first image you get as a reference image. This works for simple examples but if you want to detect motion over time you need to take a different approach. Otherwise, things like the sun’s position in the sky will cause the lighting in the room to change. This is interpreted as a change in color and the detector will be constantly firing.
What you can do is take a weighted average of your existing reference frame and the current frame. This allows the reference frame to evolve over time while still allowing for a good comparison.
Delta
Speaking of comparisons, that’s what we’re gonna do next. We take the reference frame and subtract it from the current frame. This gives us the image in the bottom-left corner.
This is where it all starts to come together - this subraction produces solid black if the colors are the same and a gray-to-white if the colors are different. When viewed all together it forms an impression of just the parts of the image that changed.
Contours
Now that we have the motion we’re all done, right? Well, not so fast - if you look at the ceiling fan, we’re picking up traces of the shadow on the ceiling. We might not want that.
The solution here is to detect the contours of the image and only keep the ones above a certain threshold. This can be seen in the bottom-right image.
Output
Now that we have all of the contours defined we can easily calculate the bounding boxes. From here, the easiest thing to do is draw these boxes on the input images. These are the blue squares you see in the top-left.
This is good for display purposes but if you want to do something programatically you need more data. You may have noticed the numbers in the upper left corner. These two numbers are # of contours | total area of contour bounding boxes. I’ll touch on what you can do with these in the next section.
Taking it Further
Now that we can detect motion on a single frame, what do we do? Keeping a single frame of motion doesn’t really tell us what is going on. It would be better to save an entire segment of motion as one video/gif. Great, how do we do that?
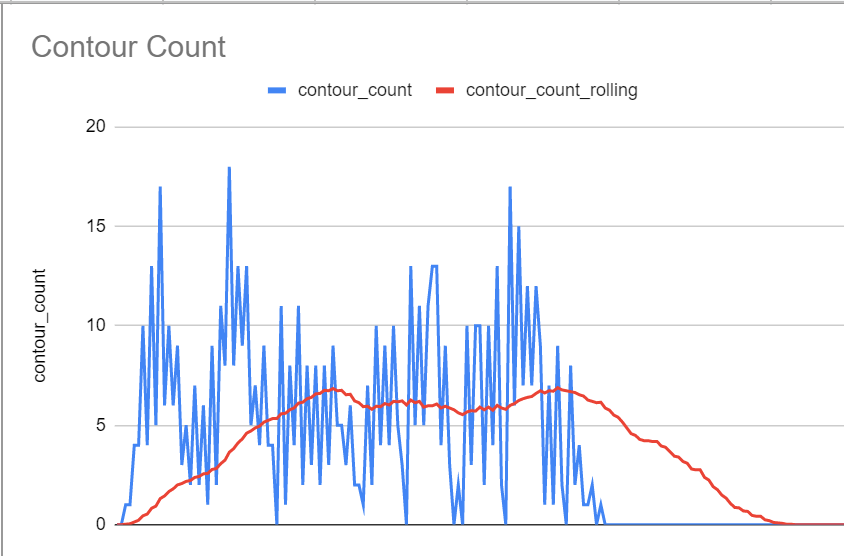
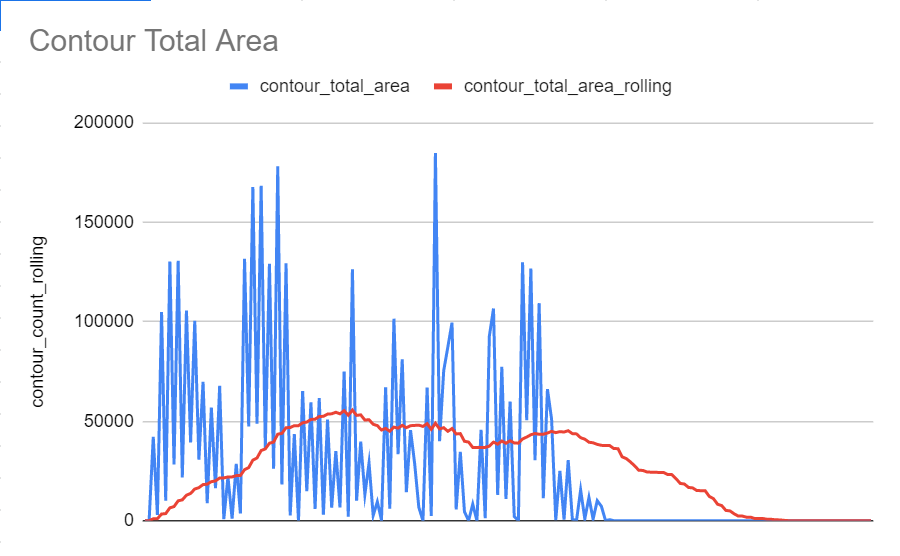
My solution was to keep a rolling average of the number of contours. I save frames when that rolling average goes above zero and stop when it falls below a certain threshold. Take the following video:
Now look at a graph of these two items over time
The rolling average (in red) keeps going even when the input value (in blue) hits zero. It also allows two segments of motion to count as one if there is only a small break. It does leave a section at the end where there is no motion but this isn’t a huge deal.
There is one final point worth mentioning. So far, the gifs I’ve included here are screen captures of the debug interface. The actual motion detector will create a gif and write it to my Google drive. This gif is constrained to 250 frames. If I have more frames than that, I will skip evenly throughout the frames in order to capture a complete picture of what happened. This helps keep the file size down (though they’re still 20MB, so I won’t include it here.)
The whole thing can be found here: https://github.com/marshcode/motion/blob/master/project/detector.py#L150 [↗]
